
Solid House Construct
Location: Dagenham, Essex
Member Since: 4th Jan 2025
Feedback:
2 reviews, 100% Positive
Trades:
- Refurb Specialists
About Us:
Specialise in delivering projects to the highest standards. By choosing us, you are choosing a solid foundation for the future.
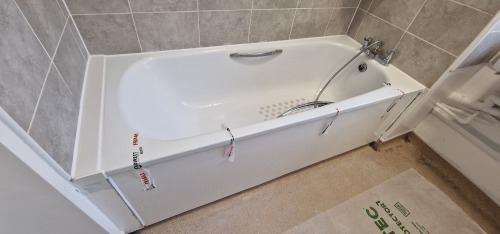
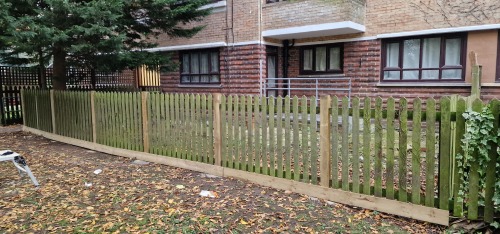
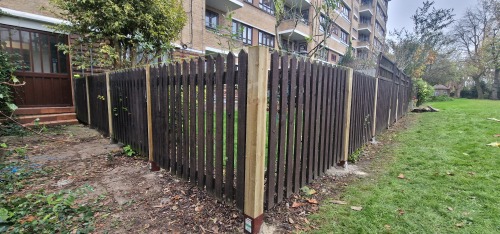
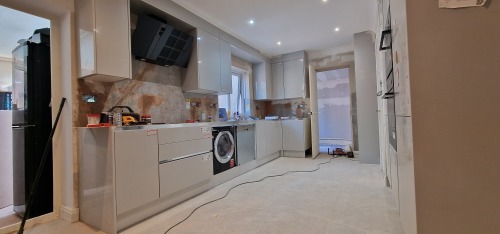
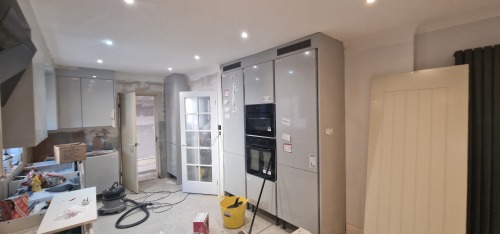
Photos:

Feedback:
2 reviews, 100% Positive
Answers:
A crack in the plaster ceiling below the loft, especially in an older house (built in the 1950s) that hasn’t been updated, could potentially indicate structural movement or settling. however, since you mentioned there is no sagging, it may not necessarily be a severe structural issue.
possible causes:
1. thermal expansion or contraction – over time, materials expand and contract due to temperature and humidity changes, leading to cracks.
2. joist movement or shrinkage – old timber joists can dry out and shrink, causing minor movement and cracks in the plaster.
3. loft traffic or storage load – if the loft is used for storage, the load could cause minor flexing in the joists.
4. natural settlement – older homes often settle slightly over time, leading to cracks in plaster.
5. artex aging – artex coatings can become brittle with age, making cracks more likely, especially in ceilings.
when to worry:
widening cracks – if the crack is more than 3mm wide or continues to grow.
sagging or bowing – indicates joist failure or severe movement.
multiple cracks – a pattern of cracks could point to deeper structural problems.
doors and windows sticking – may indicate shifting foundations.
recommendation:
inspect the loft – check for loose joists, heavy loads, or signs of water damage.
monitor the crack – use a pencil or tape measure to track its size over time.
consult a structural engineer – if you’re unsure, or the crack worsens, a professional assessment will determine whether repairs or reinforcements are needed.
since the house hasn’t been updated, it may also be worth checking for outdated wiring, plumbing, and insulation while inspecting structural elements.
Yes, using crown trade acrylic eggshell is a good choice for repainting your en-suite ceiling. it’s moisture-resistant and provides a durable, washable finish, making it more suitable for humid environments like bathrooms compared to standard emulsions.
steps to fix and repaint:
1. remove bubbling paint:
scrape off the bubbled and loose paint using a scraper.
sand the edges smooth to blend with the surrounding surface.
2. repair with filler:
apply a high-quality, moisture-resistant filler (such as toupret interior filler or polycell moisture resistant filler).
allow it to dry fully, then sand it smooth.
3. prime the repaired areas:
this step is crucial to seal the filler and prevent moisture from penetrating again.
use a stain-blocking primer or a water-based acrylic primer/sealer suitable for bathrooms. zinsser bullseye 1-2-3 or dulux trade quick drying primer sealer are good options.
allow the primer to dry completely.
4. paint with acrylic eggshell:
apply two coats of crown trade acrylic eggshell.
ensure you allow adequate drying time between coats as specified on the tin.
additional tips:
ventilation: even with an extractor fan, ensure it runs for 15–20 minutes after showers to remove excess moisture.
dehumidifier or damp absorbers: consider adding these in winter months if condensation is excessive.
silicone sealant check: inspect joints and corners to ensure there’s no hidden moisture penetration.
by properly priming and using a durable eggshell finish, you should avoid further issues with bubbling paint in the future.
It sounds like the wall where you're trying to refit the cast iron fireplace may have weak or crumbly masonry, making it difficult for the new rawl plugs to grip securely. since the fireplace is heavy, it’s essential to create a strong and stable fixing.
solutions to fix the issue:
1. reinforce the fixing points:
remove loose material: clear out any loose or crumbly filler or plaster from the holes.
use a chemical anchor or resin bonding system:
fill the holes with a two-part epoxy resin or a chemical anchor (e.g., fischer or rawlplug chemical anchors).
insert the rawl plugs while the resin is still wet.
once it cures, the plugs will be firmly bonded to the wall.
2. try larger plugs or wall anchors:
if the wall is brick or block, you can drill deeper holes and use larger, heavy-duty wall plugs or metal anchors.
for plasterboard walls, use spring toggles or cavity anchors designed to spread the load.
3. consider frame fixings or sleeve anchors:
if the wall is solid masonry, frame fixings or sleeve anchors can provide a more robust hold compared to standard rawl plugs.
4. reinforce behind the wall (if accessible):
if it’s possible to access the back of the wall (e.g., via another room), you could add timber battens or a plywood backing board to provide additional strength behind the fixing points.
final tips:
test the fixings: before reattaching the fireplace, test the strength of the fixings by applying some force to ensure they won’t give way under the fireplace’s weight.
seal the edges: once refitted, use a fireproof sealant around the edges to ensure no gaps and improve stability.
if you’re still struggling, it may be worth consulting a builder or fireplace specialist to secure the fixture safely.
Wallpapering over a wall that has been treated with mould-resistant paint can be challenging because these paints often have a water-repellent or semi-gloss finish, which can prevent adhesive from bonding properly. the bubbling you’re experiencing is likely due to poor adhesion.
steps to fix the issue:
1. remove existing wallpaper:
strip off any wallpaper that has bubbled or failed to stick properly.
clean the wall thoroughly to remove any adhesive residue.
2. prepare the wall surface:
clean the wall: wipe the wall with a damp cloth and mild detergent to remove any dirt, grease, or mold residue.
sand the surface: lightly sand the painted wall using fine-grit sandpaper (120–180 grit) to create a keyed surface that helps adhesive bond better.
fill any imperfections: use filler to patch cracks or holes, then sand smooth when dry.
3. seal the wall:
apply a wallpaper primer/sealer (also called size) to create a uniform, adhesive-friendly surface.
a product like zinsser gardz or beeline primer sealer works well to seal porous or painted surfaces.
allow the primer to dry completely before proceeding.
4. use the right adhesive:
use a high-quality, heavy-duty wallpaper adhesive, especially if the wallpaper is thick or textured.
for difficult surfaces, consider a vinyl-to-vinyl adhesive if standard adhesive still struggles to bond.
5. apply wallpaper carefully:
smooth each section with a wallpaper smoother or brush to remove air bubbles as you go.
pay special attention to edges and seams, ensuring they are well adhered.
6. ventilation and drying time:
ensure the room is well-ventilated to aid in drying and prevent further moisture buildup that could cause bubbling.
final tips:
if mould was present before, double-check for hidden dampness behind the paint, as trapped moisture can cause adhesion problems and bubbling.
if the problem persists, you may need to consider stripping the wall entirely, applying a liner paper, and then wallpapering over the liner for better adhesion.
Other Tradesmen in Dagenham
Would you like a quote from this tradesperson?
Invite them to quote for your job & get a fast response.
- Other tradespeople may express their interest as well.