
Fbs Painting & Decorating
Location: Kelvedon Hatch, Essex
Feedback:
0 reviews
About Us:
Thank you for taking the time to consider FBS Painting & Decorating for your painting and decorating needs. With over 10 years of experience, we take pride in transforming homes and businesses into stunning spaces that our clients love.
Our services include:
- Interior and Exterior Painting: Adding life and colour to your spaces with precision.
- Wallpaper Installation: Bringing unique styles and textures to your walls.
- Renovation and Restoration: Revitalising your property with expert craftsmanship.
At FBS Painting & Decorating, our mission is simple – to enhance the beauty of your space while delivering unmatched quality and professionalism. We approach every project with attention to detail, dedication, and a passion for creating exceptional results.
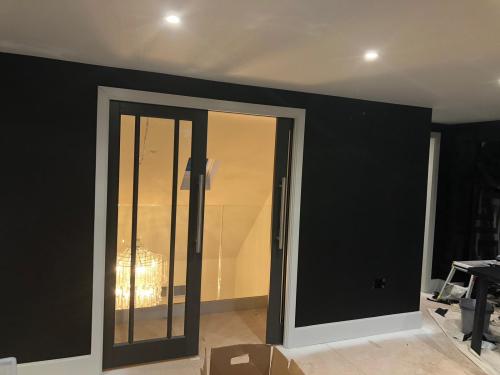
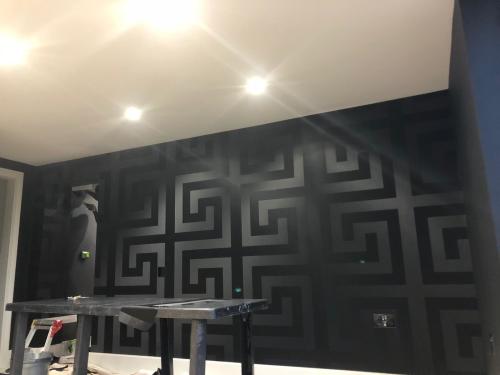
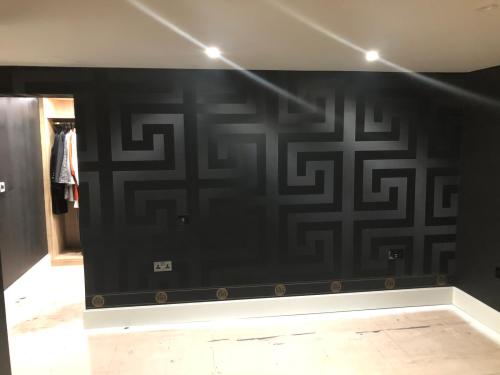
Photos:
Feedback:
0 reviews
Answers:
Yes, most kitchen lever mixer taps use a ceramic cartridge, and while there isn't a single standard size that fits all taps, some sizes are more commonly used than others. the most common sizes for kitchen lever mixer tap cartridges are:
35mm ceramic cartridge
40mm ceramic cartridge
these measurements refer to the diameter of the cartridge.
how to determine the right cartridge size:
manufacturer's specifications: check the brand and model of your tap. many manufacturers specify the cartridge size in the product manual or online documentation.
visual inspection: if you can't find documentation, you'll need to remove the cartridge from the tap to measure it directly. this involves:
turning off the water supply.
removing the lever handle (usually by loosening a screw underneath the decorative cap).
unscrewing the retaining nut to access the cartridge.
measuring the diameter and height of the cartridge.
other considerations:
type of cartridge: ensure you get a ceramic disc cartridge if that's what your tap uses. some older taps might use a different mechanism.
compatibility: cartridges are not universal. even if the size matches, the shape and alignment of the fitting (e.g., notches and pins) must be compatible with your specific tap.
Wallpapering over a mold-affected wall can lead to issues like bubbling, poor adhesion, and mold growth underneath the wallpaper. to address this effectively and ensure a smooth, long-lasting finish, follow these steps:
step 1: identify and eliminate the mold source
locate the cause: mold often develops due to moisture or poor ventilation. address the underlying issue by fixing leaks, improving ventilation, or using a dehumidifier. without resolving the source of moisture, mold will return.
kill the mold: use a mold-killing solution (e.g., a mixture of 1 part bleach to 4 parts water or a commercial mold remover). apply it to the affected area and let it sit for 15-20 minutes before scrubbing and rinsing with clean water. allow the wall to dry thoroughly.
step 2: prepare the wall
remove the existing wallpaper or peeling paint:
scrape off loose paint and clean the wall thoroughly.
if there are remnants of wallpaper adhesive, use a wallpaper stripper to remove it.
sand the wall:
lightly sand any uneven areas to create a smooth surface for the wallpaper.
focus on areas where the mold course paint might have created a rough texture.
apply a stain-blocking primer:
use a mold-resistant or stain-blocking primer to seal the surface and prevent moisture or mold from seeping through. this will also help the wallpaper adhesive bond properly to the wall.
step 3: test adhesion
before proceeding with wallpapering the entire wall, test the adhesive by applying a small strip of wallpaper. if it adheres well without bubbling, you’re ready to move forward.
step 4: use the right adhesive
use a high-quality wallpaper adhesive designed for challenging surfaces. for vinyl wallpaper, use a heavy-duty adhesive.
apply the adhesive evenly, ensuring no dry patches are left that could cause bubbling.
step 5: wallpaper application
hang the wallpaper:
apply the wallpaper from top to bottom, smoothing it out as you go with a wallpaper brush or smoothing tool to remove air bubbles.
pay attention to edges:
press firmly along the edges to ensure they adhere properly.
trim excess:
use a sharp blade or utility knife to trim excess wallpaper at the edges for a clean finish.
step 6: monitor for issues
check for bubbles as the wallpaper dries. small bubbles may disappear on their own, but larger ones can be pricked with a pin and smoothed out.
important tips:
avoid wallpapering directly over mold: mold can continue to grow under the wallpaper if not fully treated and removed.
choose breathable wallpaper: non-vinyl or breathable wallpapers can help prevent moisture buildup.
ventilate the area: ensure the room is well-ventilated during and after wallpapering to prevent humidity from becoming trapped.
by thoroughly addressing the mold and preparing the wall properly, you’ll create a clean surface that allows the wallpaper to adhere well and avoid bubbling.
It sounds like your repairs weren’t adequately sealed or prepared, which has led to moisture penetrating the repaired areas. here's a step-by-step plan to properly fix the ceiling and ensure the new paint holds up in a humid environment:
step 1: remove the bubbled paint
scrape away the bubbled paint and any loose or peeling sections around the repaired areas using a putty knife.
sand the area lightly to smooth out any edges and create a uniform surface.
step 2: repair the damaged areas again
apply filler:
use a high-quality, water-resistant filler designed for use in humid areas.
smooth it out with a putty knife and allow it to dry completely according to the manufacturer’s instructions.
sand the filler:
once dry, sand the repaired areas with fine-grit sandpaper (e.g., 120-180 grit) to create a smooth surface that blends with the surrounding ceiling.
step 3: prime the repaired areas
this step is essential to prevent moisture from penetrating the repaired areas again:
use a stain-blocking primer or a primer specifically designed for bathrooms or humid environments. a primer like zinsser bulls eye 1-2-3 or zinsser bin shellac-based primer is ideal for sealing the filler and providing a good base for the paint.
apply the primer to the repaired spots (and optionally the entire ceiling for extra durability). let it dry thoroughly.
step 4: repaint the ceiling
choose the right paint:
crown trade acrylic eggshell is a good choice for bathrooms as it is durable, has a low sheen, and provides good resistance to moisture and mold.
other options include paints specifically designed for bathrooms, such as dulux easycare bathroom or johnstone’s bathroom paint.
apply the paint:
use a high-quality brush or roller, and apply two thin, even coats for the best finish.
allow the first coat to dry fully before applying the second.
step 5: ventilation and maintenance
to prevent future issues:
ensure the extractor fan is working effectively to remove steam from the en-suite.
consider leaving the door ajar after showers to allow better air circulation.
use a squeegee to remove water from shower walls and ceilings after use to reduce condensation buildup.
by priming the repaired areas and using a durable, moisture-resistant paint like crown trade acrylic eggshell, your ceiling will be much better protected against condensation and steam damage. following these steps should give you a lasting, smooth, and professional-looking finish.
Would you like a quote from this tradesperson?
Invite them to quote for your job & get a fast response.
- Other tradespeople may express their interest as well.